It was a cold and rainy day...
So I hopped on Pinterest and found two awesome ideas...and put them together! I originally found the homemade kids play oven and thought "Wow! My kids would love to make that!" I later found a Pin with the idea of turning baking sheets into magnet boards. My mind wandered with ideas and possibilities. I finally came to this. I'd make the kids oven, and turn the baking sheet into the front of a mini fridge! So here's how I did it:
So I hopped on Pinterest and found two awesome ideas...and put them together! I originally found the homemade kids play oven and thought "Wow! My kids would love to make that!" I later found a Pin with the idea of turning baking sheets into magnet boards. My mind wandered with ideas and possibilities. I finally came to this. I'd make the kids oven, and turn the baking sheet into the front of a mini fridge! So here's how I did it:
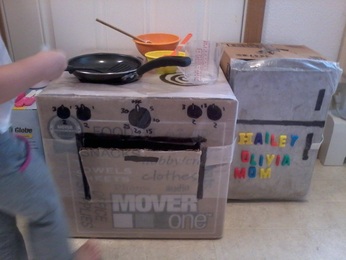
First, I dug through my collection of boxes in the basement. I found one that would make a perfect oven! I taped the top flaps together. Then I cut out the oven door. I wrapped the front and top of the box with wax paper and taped the ends to hold it in place (you can skip the wax paper or use a different paper, I just used it to cover up all the words on the box). Last, I used a giant Sharpie marker to draw on knobs, a handle, and burners. Tada! The oven is complete! Now on to the mini fridge...
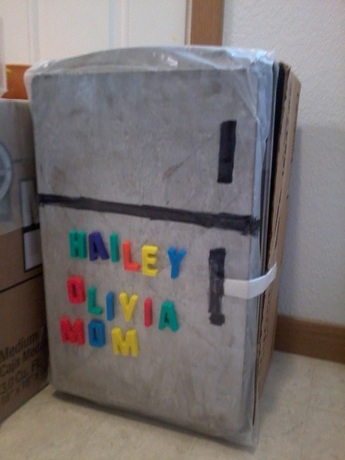
The only other box I had that would work was too weak for the door I was about to add. If you make this, make sure you use a strong sturdy box with strong sturdy flaps. The box I ended up using was actually perfect because it was exactly the same size as the baking sheet! Now on to how we made this... After finding our box, we cut off all the top flaps except for one long flap. I covered one side of the baking sheet with wax paper, then taped the baking sheet securely to the long flap. Your mini fridge door should now be able to swing open and shut. Next, I rolled up some extra wax paper, stuck a piece of rolled tape to one end of it, and taped the other end to the door. Now you can keep the door closed by pressing the end of wax paper with the rolled tape to the side of the mini fridge. We again used the giant Sharpie to make it look like a real fridge with doors and handles. Now the mini fridge is ready to plug in and get cold! (pretend, of course!)
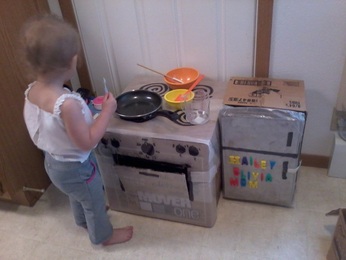
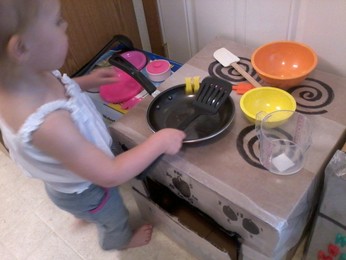
Time to accessorize! I went through the cupboards and found some old utensils, bowls, measuring cup, and a pan for them to use with their new oven. Olivia is already cooking me some pancakes! To finish off the mini fridge, find some magnets (we used alphabet magnets) and stick them on the front of the fridge! (The baking sheet is metal...magnets will stick to it...awesome!!!) Now if we just had some pretend food! Oh the possibilities!!!


 RSS Feed